
How to Create a Cohesive Brand Identity Through Custom Apparel
Your brand is more than just a logo—it’s the complete experience people have with your business. Every touchpoint, from your website to your customer service to yes, even what your team wears, contributes to how people perceive your company. Custom apparel offers a powerful opportunity to reinforce your brand identity in a tangible, visible way that creates lasting impressions. Many businesses treat branded apparel as an afterthought, ordering random items without considering how they fit into their overall brand strategy. The result? Inconsistent messaging, wasted money, and missed opportunities to strengthen brand recognition. Let’s explore how to use custom apparel strategically to create a cohesive brand identity that resonates with customers and employees alike. Start With Your Core Brand Elements Before ordering a single shirt, you need clarity on your fundamental brand elements. Your logo is the foundation—it should be professionally designed, available in vector format, and versatile enough to work across different applications and sizes. Brand colors matter tremendously. Define your primary and secondary color palette using specific Pantone numbers for consistency. These colors should appear consistently across all your branded materials, including apparel. If your brand uses navy blue and orange, those should be your go-to colors for custom t-shirt printing, not whatever colors happen to be on sale. Your brand voice and personality influence apparel choices too. A playful, creative brand might embrace bold graphics and trendy styles. A professional services firm probably needs more conservative, polished options. Your apparel should feel like a natural extension of your brand, not a contradiction to it. Typography also plays a role. If your brand uses specific fonts consistently, incorporate them into apparel designs when appropriate. This subtle consistency strengthens recognition even if people don’t consciously notice it. Develop Apparel Guidelines Just Like Visual Guidelines Most established brands have visual identity guidelines covering logo usage, colors, and design standards. Your apparel program deserves similar structure. Create guidelines that specify approved garment styles, acceptable logo placements and sizes, approved color combinations, and design dos and don’ts. These guidelines ensure consistency whether you’re ordering screen printing for an event, custom embroidery for executive team polos, or promotional items for a trade show. Everyone involved in ordering branded apparel has clear direction, preventing the hodgepodge look that comes from uncoordinated decisions. Document specifics like “logo should be 3.5-4 inches wide on left chest placement” or “only use embroidery on polo shirts and jackets, screen printing on t-shirts and casual items.” These details might seem minor, but they create the visual consistency that makes your brand instantly recognizable. Include examples of approved designs and, just as importantly, examples of what not to do. Visual references prevent misinterpretation and make guidelines actionable rather than theoretical. Create Distinct Apparel for Different Audiences Not everyone needs the same branded apparel, and strategic differentiation actually strengthens your brand identity. Consider creating distinct apparel categories for different groups while maintaining overall cohesion. Employee uniforms or standard wear should be professional, durable, and comfortable enough for regular use. Polo shirts with embroidered logos work beautifully for customer-facing staff. T-shirts or performance wear might suit warehouse or field employees better. The key is that all options clearly identify the wearer as part of your team while being appropriate for their specific role. Corporate & team apparel for leadership might include higher-end items like quarter-zips, soft-shell jackets, or premium polos. Slightly elevated quality signals their position while maintaining brand consistency through shared logos and colors. Customer-facing merchandise requires a different approach. These items need to be attractive enough that people actually want to wear them beyond your event or store. Think retail quality, not just branded giveaways. When customers choose to wear your brand, they become voluntary ambassadors. Promotional giveaways can be more budget-conscious while still maintaining quality standards. Promo products like basic tees, water bottles, or bags spread brand awareness, but they should still meet minimum quality thresholds. Cheap items that fall apart quickly reflect poorly on your brand. Logo Placement and Design Consistency Where and how you place your logo might seem trivial, but consistency in placement reinforces brand recognition. Decide on standard placements for different garment types and stick with them across all orders. Left chest placement (3.5-4 inches wide) is classic for business casual items like polos and button-downs. Full chest or center chest works for casual t-shirts and athletic wear. Back designs provide more visibility for events or when you want maximum brand exposure. Sleeve placement offers subtle branding for a more understated look. Using custom embroidery for certain items and printing for others is fine, but be strategic. Perhaps embroidery is reserved for management or customer-facing roles, creating subtle differentiation while maintaining brand cohesion. Maybe embroidery appears on all polo shirts regardless of who wears them, creating consistent premium quality across your team. Size matters too. Your logo should be large enough to be clearly visible and recognizable but not so oversized that it overwhelms the garment. A logo that works beautifully at 4 inches wide might look ridiculous blown up to 12 inches. Color Strategy Beyond Just Your Brand Colors While your primary brand colors should feature prominently in your apparel program, smart color strategy includes more nuance. Offering garment colors that complement your brand colors while providing variety keeps things interesting without sacrificing cohesion. If your brand is red and black, you might offer shirts in red, black, white, and charcoal gray—all coordinating with your brand palette. This variety prevents monotony while maintaining visual connection to your brand. Consider seasonality too. Darker colors work well year-round but can feel heavy in summer. Lighter, brighter options for warm weather keep your apparel program fresh and appropriate for the season while still incorporating brand elements. For items using DTF & DTG transfers or screen printing, you can adjust ink colors to work optimally on different garment colors. Your logo might be black on white shirts, white on black shirts, maintaining brand consistency while ensuring good visibility and contrast. FAQ How many different apparel items should
What to Know Before Ordering Custom Apparel for the First Time
Ordering custom apparel for the first time can feel overwhelming. Between choosing printing methods, selecting garments, preparing artwork, and understanding pricing, there’s a lot to navigate. Many first-time buyers make costly mistakes simply because they didn’t know what questions to ask or what factors to consider. The good news? With some basic knowledge, ordering custom apparel becomes straightforward and even enjoyable. Whether you’re creating custom t-shirt printing for your business, team uniforms, or event merchandise, understanding these key considerations ensures a smooth experience and results you’ll be proud of. Know Your Quantity Before You Start One of the first questions any printer will ask is “how many pieces do you need?” This isn’t just administrative—your quantity directly impacts which decoration methods make sense and what you’ll pay per piece. Different printing methods have different minimum order quantities and pricing structures. Screen printing becomes economical around 24-50 pieces because setup costs get distributed across more items. For smaller quantities (1-20 pieces), methods like vinyl transfers or DTF & DTG transfers often make more financial sense. If you’re unsure about exact quantities, estimate on the higher side initially. It’s easier to reduce an order slightly than to place a rushed second order when you realize you’re short. For events, ordering 10-15% extra covers last-minute attendees, replacements for damaged items, or future needs. Understand the Different Decoration Methods Not all custom apparel is created equal. The decoration method significantly impacts appearance, durability, cost, and what designs are possible. Screen printing excels at bulk orders with designs using 1-4 solid colors. It’s cost-effective at higher quantities and produces vibrant, durable prints. Custom embroidery creates a premium, textured look perfect for polo shirts, jackets, and hats. It’s more expensive per piece than printing but conveys professionalism and quality that justify the investment for corporate & team apparel. Digital printing methods work beautifully for complex designs with many colors or photographic elements. They’re ideal for smaller quantities where screen printing setup costs don’t make sense. Vinyl transfers excel at personalization—adding individual names or numbers to garments. Each method has strengths and limitations. Don’t just choose based on cost alone. Consider how the items will be used, washed, and what impression you want to make. Prepare Your Artwork Properly Artwork issues are the most common cause of delays and disappointment with custom apparel orders. Your design needs to meet specific technical requirements depending on the decoration method chosen. For printing, vector files (AI, EPS, PDF) are ideal because they scale without quality loss. If you only have raster images (JPG, PNG), they need to be high resolution—at least 300 DPI at the size you want printed. That logo on your website is probably only 72 DPI and won’t print well when enlarged. For embroidery, designs need to be relatively simple. Thin lines, tiny text (under 0.25 inches), and intricate details don’t translate well to thread. Gradients and photographic elements must be significantly simplified. If you’re unsure about your artwork quality, ask your printer to review it before placing your order. Most reputable companies offer free file reviews and will alert you to potential issues. Choose the Right Garments for Your Needs The apparel itself matters as much as what goes on it. Cheap shirts make even the best printing look unprofessional, while quality garments elevate your entire project. Consider where and how items will be worn. Office environments might call for polo shirts or button-downs. Casual events work well with standard t-shirts or tanks. Outdoor workers need durable, comfortable options that withstand regular washing. Fabric choice impacts both comfort and print quality. 100% cotton feels soft and breathable but shrinks more than blends. Cotton-polyester blends resist shrinking and wrinkles while costing less. Performance fabrics wick moisture for athletic applications. Fit matters tremendously. Offer both unisex and fitted options if possible, and carry extended sizes so everyone feels included. Nothing kills enthusiasm for branded apparel faster than ill-fitting garments. Ask your printer for samples if possible. Understand the True Cost Structure Custom apparel pricing includes multiple components, and understanding them prevents surprise charges. The garment itself has a cost—a basic t-shirt might run $3-8, while a quality polo costs $15-25. Then comes decoration costs, which vary by method. Screen printing typically includes a setup fee (covering screen creation) plus a per-piece printing cost. Setup might be $15-50 per color, while printing costs $2-5 per shirt depending on design complexity. Embroidery includes a one-time digitizing fee ($15-75) to convert your design into an embroidery file, plus per-piece embroidery costs based on stitch count. Design or artwork fees may apply if your files need professional preparation. Rush fees add 20-50% for expedited production. Get itemized quotes showing all costs separately so you understand exactly what you’re paying for. Compare quotes from multiple providers, but remember the cheapest option isn’t always the best value if quality suffers. Plan Your Timeline Appropriately Custom apparel takes time. Standard turnaround is typically 7-14 business days from artwork approval, though this varies by company, order size, and decoration method. Rush services exist but cost significantly more. Don’t wait until the last minute. If you need items by a specific date, work backward from that deadline. Add time for design revisions, sample approval, production, and shipping. Building in a buffer protects you if unexpected issues arise. Communicate your deadline clearly to your printer. A trusted custom apparel provider will be honest about whether they can meet your deadline rather than overpromising and underdelivering. Ask Questions and Communicate Clearly Don’t assume anything. If you’re unsure about sizes, colors, placement, or any other detail, ask. Good printers want you to be happy and will answer questions patiently. Be specific about your needs and expectations. Vague requests like “make it look good” leave too much to interpretation. Instead, provide clear direction: “I want the logo centered on the chest, about 4 inches wide, in our brand colors.” Request a digital mockup or physical sample before full production when possible. Seeing a preview helps catch misunderstandings before they become
The Ultimate Guide to Choosing the Right Shirt Style for Your Custom Design
Choosing the right shirt style is just as important as the design you put on it. The perfect logo on the wrong garment creates disappointing results, while a well-matched shirt and design combination elevates your entire project. Whether you’re creating custom t-shirt printing for an event, outfitting your team, or launching a merchandise line, understanding different shirt styles helps you make choices that look great and serve their intended purpose. With hundreds of shirt styles available, the options can feel overwhelming. Let’s break down the most popular styles, their best uses, and how to match them with your custom design for optimal results. Classic Crew Neck T-Shirts The crew neck t-shirt is the workhorse of custom apparel. This timeless style features a round neckline and short sleeves, making it universally wearable and appropriate for nearly any casual situation. Crew necks work beautifully for event shirts, promotional giveaways, casual team wear, and everyday branded apparel. They provide a clean canvas for designs, with popular placement options including center chest, left chest, or full front prints. Back designs also work well on crew necks. When choosing crew neck tees, consider the fit. Standard unisex cuts work for most people but can look boxy on some body types. Many brands now offer modern fitted crew necks with more tapered cuts that look more contemporary. For maximum inclusivity, consider offering both unisex and fitted options. V-Neck T-Shirts V-neck tees offer a slightly dressier alternative to crew necks while maintaining casual comfort. The V-shaped neckline creates a more elongated, flattering silhouette that many people prefer. V-necks are particularly popular for retail merchandise, women’s apparel programs, and situations where you want something a step above basic crew necks without going full polo shirt. They work well for service industries, hospitality, or any environment where casual professionalism matters. Design placement on V-necks requires slight adjustment. Left chest logos work beautifully, positioned to complement the neckline. Full chest designs should account for the V-neck shape rather than being centered the same way they would on a crew neck. V-necks tend to be slightly more expensive than crew necks, but the price difference is minimal—usually just $1-2 per shirt. Polo Shirts Polo shirts elevate your apparel program into business casual territory. Featuring a collar and button placket, polos convey professionalism while remaining comfortable and practical. These shirts are ideal for corporate & team apparel, client-facing employees, trade shows, golf outings, and any situation requiring a polished appearance. Polos work across industries from restaurants to real estate to tech companies. Custom embroidery is the preferred decoration method for polos. The textured, dimensional look of embroidery complements the polo’s professional aesthetic perfectly. Left chest placement (3.5-4 inches wide) is standard, though sleeve embroidery or back designs also work well. Consider fit when ordering polos. Traditional cuts are roomy and comfortable. Slim-fit or modern-fit polos offer more tailored silhouettes. Sport or performance polos use moisture-wicking fabrics perfect for active environments or outdoor work. Long Sleeve T-Shirts Long sleeve tees extend your apparel program into cooler weather while maintaining the casual comfort of standard tees. They’re perfect for fall and winter events, year-round employee apparel, or layering pieces. These shirts work well for outdoor workers, construction teams, landscape companies, or anyone spending significant time outside in variable weather. They also serve as excellent retail merchandise in seasonal markets. Design placement follows similar rules to short-sleeve tees, though you gain the option of sleeve prints—either on the upper arm or along the forearm. Some designs incorporate text or graphics running along the sleeves for visual interest. Long sleeves cost $3-6 more than comparable short-sleeve options, but they significantly extend the wearability of your branded apparel program across seasons. Tank Tops and Sleeveless Shirts Tank tops serve specific niches—summer events, beach promotions, fitness centers, or athletic teams. They maximize comfort in hot weather and suit active, casual environments. Design options are somewhat limited on tanks due to the reduced surface area. Center chest or small left chest placements work best. Very large designs can look awkward on the limited front space. Tank tops are generally less expensive than standard tees, making them budget-friendly for summer promotions. However, their specific use case means they won’t work for all applications or audiences. Hoodies and Sweatshirts Hoodies and crew neck sweatshirts transform your apparel program into year-round outerwear. These pieces typically cost more ($20-60) but offer significant value as items people genuinely want to wear. Hoodies work beautifully for retail merchandise, premium employee gifts, team gear, or event apparel in cooler months. The larger surface area accommodates bigger, bolder designs. Full chest prints, large back designs, or sleeve printing all work well on hoodies. Pullover hoodies are most common and economical. Zip-up hoodies offer more versatility for layering and temperature regulation but cost slightly more. Consider offering both in your apparel program. Performance and Athletic Shirts Moisture-wicking performance fabrics suit athletic teams, gyms, active companies, or anyone prioritizing comfort during physical activity. These shirts pull sweat away from skin, dry quickly, and resist odors. Performance shirts work with most decoration methods, though screen printing with specialized inks designed for synthetic fabrics produces the best results. Some performance fabrics can be challenging for certain decoration techniques, so consult with a trusted custom apparel provider about the best approach. FAQ What’s the most versatile shirt style? Classic crew neck t-shirts in medium weight (5-6 oz) work for the widest range of applications, audiences, and budgets. They’re the safe choice when you need something that works for nearly everyone. Should we offer multiple shirt styles? If budget allows, offering 2-3 options (perhaps a t-shirt, polo, and hoodie) gives people choices while keeping things manageable. More options increase satisfaction but add complexity to ordering and inventory. How do I choose between unisex and fitted styles? Offering both when possible maximizes inclusivity. If you must choose one, unisex fits accommodate more body types, though fitted options are increasingly popular. Do certain designs work better on specific shirt styles? Yes. Simple, professional logos
Vinyl Transfers vs. Screen Printing: Which Is Better for Your Project?
When it comes to decorating custom apparel, vinyl transfers and screen printing are two popular methods that each have passionate advocates. Both produce quality results, but they work very differently and excel in different situations. Choosing the wrong method can mean paying more than necessary, getting lower quality results, or facing limitations that don’t align with your needs. Understanding the key differences between these two decoration techniques helps you make informed decisions that balance quality, cost, and practicality. Let’s compare vinyl transfers and screen printing to help you determine which method is right for your specific project. How Screen Printing Works Screen printing is a traditional method that’s been perfecting apparel decoration for decades. The process involves creating a stencil (called a screen) for each color in your design. Ink is then pushed through these screens onto the fabric, with each color requiring a separate screen and application. The setup process takes time and has upfront costs, but once screens are created, printing each additional shirt becomes quick and inexpensive. This is why screen printing is ideal for larger quantities—the per-shirt cost drops significantly as order sizes increase. Screen printing produces vibrant, durable prints with excellent color saturation. The ink bonds with the fabric fibers, creating designs that can withstand hundreds of washes when properly cared for. For bulk orders with simple to moderate design complexity, screen printing remains the industry standard. However, screen printing has limitations. Each color requires a separate screen, making complex multi-color designs expensive. Very small orders (under 12-24 pieces) often aren’t economical because setup costs get divided among fewer items. Detailed designs with gradients or photographic elements can be challenging. How Vinyl Transfers Work Vinyl transfers take a completely different approach. Designs are cut from sheets of colored vinyl using a precision cutting machine. The excess vinyl is removed (a process called weeding), leaving only your design. This vinyl is then heat-pressed onto the garment, where it adheres permanently. There are different types of vinyl for different applications. Standard heat transfer vinyl (HTV) works for most apparel. Specialty vinyls include glitter, metallic, reflective, and flock (fuzzy texture) varieties that create unique visual effects impossible with screen printing. Vinyl transfers excel at small quantities, even single items. There’s minimal setup required—just design, cut, weed, and press. This makes vinyl perfect for custom names, numbers, one-off designs, or situations where you need just a few items quickly. Vinyl also works beautifully for layered designs where different colors stack on top of each other. Each color is simply another layer of vinyl, making multi-color designs no more complex than single-color ones (unlike screen printing where each color multiplies the work). The main limitations? Vinyl doesn’t work well for very detailed designs with small elements. Fine lines, tiny text, or intricate details are difficult or impossible to cut precisely. Vinyl also has a different feel than screen printing—it sits on top of the fabric rather than bonding into it, creating a slightly raised surface. Cost Comparison: When Each Method Makes Sense Pricing is often the deciding factor, and the most economical choice depends heavily on quantity. For orders of 1-10 pieces, vinyl transfers typically cost less because there are no setup fees. You’re paying for materials and labor to cut and press each design, but these costs are relatively fixed per piece. Screen printing for very small quantities (under 12-24 pieces) becomes expensive per item because setup costs—creating screens, mixing inks, setting up the press—get divided among fewer shirts. A design requiring four colors might have $100-150 in setup costs. Divided among 10 shirts, that’s $10-15 per shirt just for setup, before counting the actual printing or garment cost. As quantities increase, screen printing becomes increasingly cost-effective. At 50 pieces, setup costs drop to $2-3 per shirt. At 100 pieces, they’re just $1-1.50 per shirt. The actual printing cost per shirt is also lower than vinyl, often $2-5 depending on the number of colors. Vinyl costs remain relatively consistent regardless of quantity. Whether you’re making 5 shirts or 50, the per-piece cost stays similar—typically $5-12 per design depending on size and complexity. This consistency makes budgeting easy but means vinyl doesn’t offer quantity discounts like screen printing does. The crossover point where screen printing becomes cheaper than vinyl is typically around 12-24 pieces, though this varies based on design complexity and number of colors. Working with a trusted custom apparel provider who offers both methods ensures you get honest recommendations about which approach saves you money. Design Complexity and Limitations Screen printing handles most design types well. Simple logos with 1-4 solid colors are perfect. More complex designs with gradients or many colors are possible but increase costs with each additional screen required. Extremely detailed artwork or photographic images work better with DTF & DTG transfers than traditional screen printing. Vinyl transfers work best for bold, simple designs with clean edges. Text, names, numbers, and geometric shapes are ideal for vinyl. The cutting process can handle moderate detail, but there are limits—very thin lines (under about 1/16 inch) or tiny text may not cut cleanly. Intricate designs with many small elements become tedious to weed and may not be worth the labor involved. For designs requiring many colors, screen printing and vinyl have opposite cost structures. Screen printing costs more with each additional color, while vinyl’s cost is primarily driven by the total size of the design rather than the number of colors. A design with eight colors might be expensive to screen print but relatively straightforward with layered vinyl. Specialty effects differ between methods too. Screen printing can create unique effects like puff ink (raised, dimensional printing), discharge printing (removing garment color for a soft print), or specialty inks like metallic or glow-in-the-dark. Vinyl offers its own special effects—glitter, holographic, reflective, or textured vinyls create looks that screen printing can’t match. Durability and Longevity Both methods produce durable results when done correctly, but the wear patterns differ. Screen printed designs integrate with the fabric fibers, creating prints
How to Prepare Your Artwork for Custom Embroidery: A Step-by-Step Guide
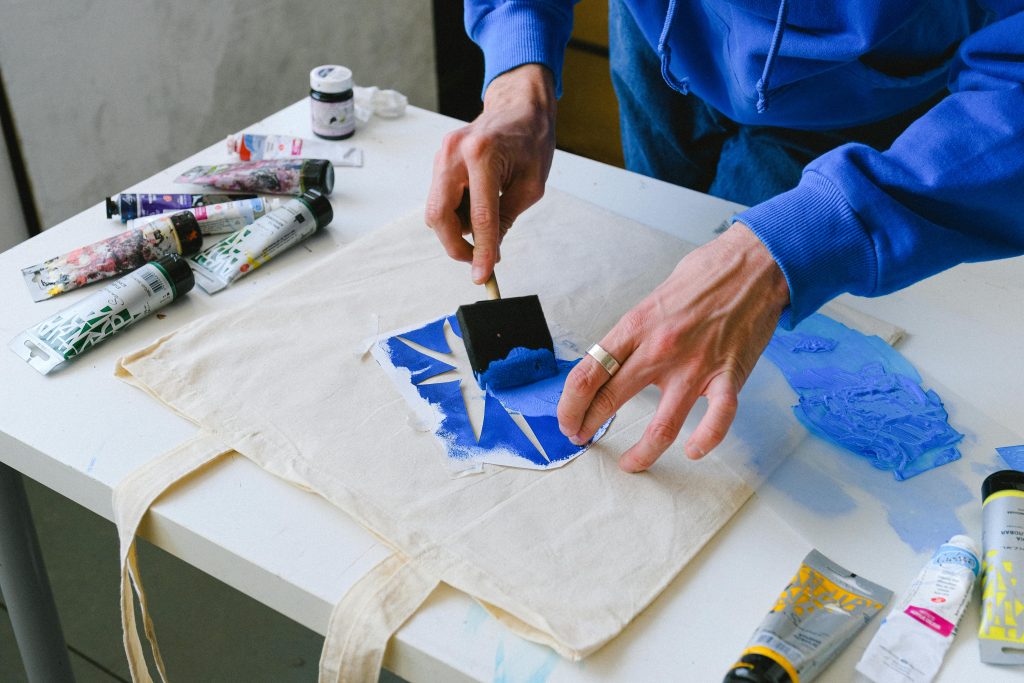
Custom embroidery adds a premium, professional touch to apparel that elevates your brand. But the quality of your final embroidered product depends heavily on how well you prepare your artwork. Unlike printing methods where almost any digital file can work, embroidery has specific requirements that directly impact the final result. Poor artwork preparation leads to costly revisions, delays, and embroidered designs that don’t match your vision. The good news? With proper preparation, you can ensure your embroidered apparel looks crisp, professional, and exactly how you imagined. Let’s walk through the step-by-step process of preparing artwork for custom embroidery. Understanding How Embroidery Works Before diving into artwork preparation, it helps to understand what happens during the embroidery process. Unlike screen printing where ink is applied to fabric, embroidery uses needles and thread to stitch your design directly into the garment. Your digital artwork must be converted into a digitized embroidery file—essentially a set of instructions telling the machine where to place each stitch, what color thread to use, and in what order. This digitizing process is critical and requires expertise to translate your design into thread effectively. The embroidery machine follows these instructions, stitching your design one color at a time. Thread has physical limitations that digital designs don’t—it can’t reproduce extremely fine details, gradients, or photographic images the way DTF & DTG transfers can. Understanding these limitations from the start helps you create artwork that embroideries beautifully. Step 1: Start With Vector Files When Possible The best artwork for embroidery starts as a vector file. Vector graphics (AI, EPS, or PDF formats created in programs like Adobe Illustrator) use mathematical paths rather than pixels, giving clean, scalable lines that digitizers can easily work with. Vector files make the digitizing process faster and more accurate, which often translates to lower digitizing fees and better final results. The clean edges and solid shapes in vector artwork translate perfectly into the clean stitch lines embroidery produces. If your logo or design was professionally created, contact your designer for the original vector files. These are the gold standard for embroidery preparation and will give you the best possible results. If you only have raster files (JPG, PNG), high-resolution versions at least 300 DPI can work, but the digitizer will need to spend extra time interpreting the design. This can increase costs and introduce slight variations from your original artwork. Step 2: Simplify Your Design Embroidery favors simplicity. The most successful embroidered designs have clean lines, solid fills, and minimal fine detail. Think of iconic brand logos like Nike, Adidas, or Ralph Lauren—simple, bold, and instantly recognizable when embroidered. Review your design and remove unnecessary complexity. Thin lines that look great on screen often become thick, blurred stitches in embroidery. Text smaller than about 0.25 inches tall (roughly 18-point font) becomes illegible when stitched. Intricate details, tiny decorative elements, or complex patterns usually don’t translate well. If your logo has gradient shading or photographic elements, these need to be simplified for embroidery. Gradients don’t exist in thread—you have solid colors only. Work with a professional to adapt complex designs into embroidery-friendly versions while maintaining brand recognition. Consider creating a simplified embroidery version of your logo separate from your full-detail print version. Many successful brands maintain multiple logo variations optimized for different applications. Step 3: Choose Appropriate Colors Thread comes in specific colors, typically matched to the Pantone color system. While there are thousands of thread colors available, they’re still discrete options—not the millions of colors possible in digital design. Review your design’s color palette and identify the exact colors you want. If brand color accuracy is critical, specify Pantone colors so your embroiderer can match thread as closely as possible. Most custom embroidery providers have extensive thread color charts you can reference. Limit the number of colors when possible. While modern embroidery machines handle multiple colors easily, each additional color adds production time and cost. Designs with 1-4 colors are ideal. If your design has more, evaluate whether all colors are essential or if some can be combined without losing impact. Avoid colors that are too similar to each other or to the garment color. Light yellow on white fabric will barely show. Navy and black next to each other may look identical when stitched. Ensure sufficient contrast between colors and between your design and the garment. Step 4: Optimize Text Elements Text presents unique challenges in embroidery. Not all fonts translate well to stitches, and size limitations are stricter than with printing. Minimum text height should be 0.25 inches (about 18-point font), with 0.375 inches (24-point) being safer for readability. Anything smaller becomes a blob of stitches rather than legible letters. For corporate & team apparel where text is essential, size appropriately or consider using vinyl transfers for small text elements. Choose bold, simple fonts without thin serifs or decorative flourishes. Sans-serif fonts like Arial, Helvetica, or similar work beautifully. Script fonts can work if they’re relatively bold and simple, but delicate calligraphy-style scripts rarely embroider well. Avoid outlining text unless it’s quite large (1 inch or taller). Outlined text requires the machine to stitch the outline, then the fill, doubling production time and creating potential registration issues if the layers don’t align perfectly. Ensure adequate spacing between letters and words. Embroidery thread has physical thickness, so letters that touch or overlap in your digital file will blend together when stitched. Step 5: Consider Size and Placement Your design size dramatically affects how well it embroideries. The same design might work beautifully at 4 inches wide but become a mess at 2 inches due to detail compression. Standard left-chest logo placement typically ranges from 3.5 to 4.5 inches wide. This size allows sufficient detail while looking proportional on most garments. Larger designs (6-12 inches) work for jacket backs or full-chest placements but require simpler artwork since any flaws become more visible. Think about where the design will be placed and how that affects what details are necessary. A design on a hat brim
Why Your Small Business Needs Branded Apparel (And How to Get Started)
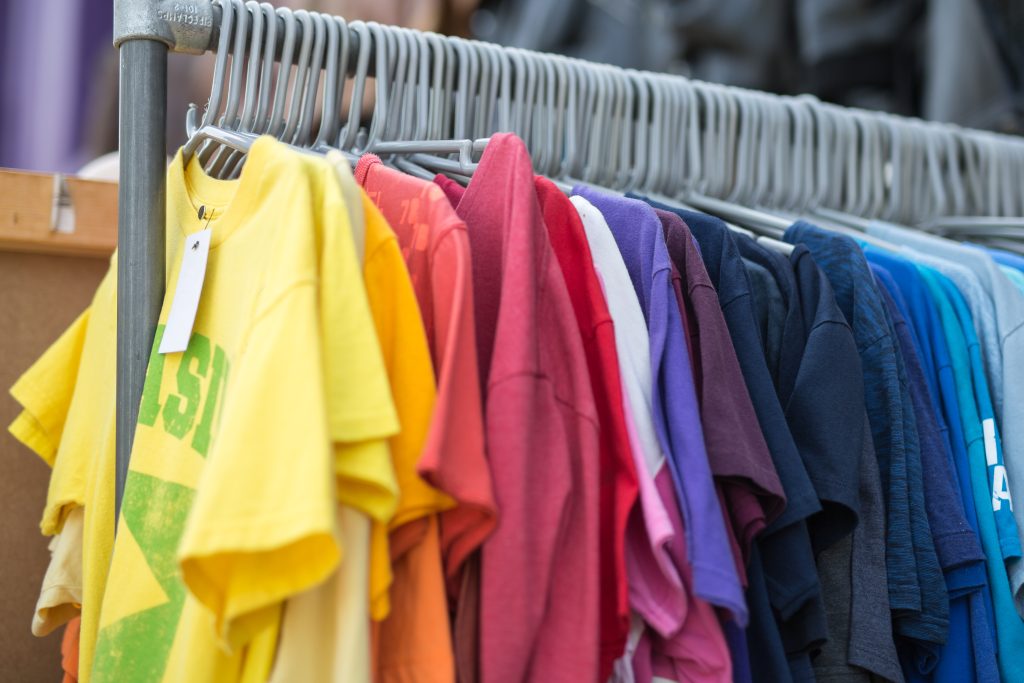
You’ve probably seen it countless times—employees wearing company shirts at local events, teams sporting matching jackets, or business owners in branded polo shirts meeting with clients. Branded apparel is everywhere, but if you’re running a small business, you might be wondering whether it’s really worth the investment. The short answer? Absolutely. Branded apparel offers benefits that go far beyond just looking professional. From building brand recognition to fostering team unity, custom clothing can be one of the most cost-effective marketing tools in your arsenal. Walking Billboards: The Marketing Power of Branded Apparel Every time someone wears your company shirt, they’re advertising your business. Unlike digital ads that disappear after someone scrolls past, or billboards that stay in one location, branded apparel travels wherever your team goes. Think about the exposure. Your employee stops for coffee on the way to work—everyone in that café sees your logo. They run errands during lunch—more potential customers see your brand. They wear the shirt to their kid’s soccer game on the weekend—dozens of parents in your community are exposed to your business. This organic, repeated exposure builds brand recognition over time. People begin to recognize your logo and associate it with your business, even if they haven’t used your services yet. When they eventually need what you offer, your brand is already familiar to them. The best part? After the initial investment in custom t-shirt printing, there are no ongoing costs. One quality branded shirt can provide thousands of impressions over its lifetime, making the cost per impression incredibly low compared to traditional advertising. Professionalism and Credibility First impressions matter tremendously in business. When your team shows up to a job site, trade show, or client meeting wearing matching corporate & team apparel, you immediately appear more professional and established. Branded clothing signals that you take your business seriously. It shows you’ve invested in your company’s image and care about how you’re perceived. This professionalism translates into trust—customers feel more confident working with a business that presents itself well. For service-based businesses, this is particularly important. If you’re sending employees to customer homes or businesses, branded shirts help customers easily identify your team members. This identification factor provides security and peace of mind for your clients. Branded apparel also helps level the playing field for small businesses competing against larger companies. When your three-person team shows up in coordinated, professional attire, you project an image of competence and reliability that can rival much bigger competitors. Building Team Unity and Company Culture Branded apparel isn’t just about external perception—it significantly impacts your internal culture too. When employees wear company gear, they feel like part of something bigger than themselves. This sense of belonging fosters team unity and pride in the organization. Employees become brand ambassadors who are more likely to speak positively about your company in their personal and professional networks. Matching apparel also breaks down hierarchical barriers. When everyone from the CEO to the newest hire wears the same company shirt, it creates a sense of equality and shared purpose. This can improve communication, collaboration, and overall morale. Cost-Effective Brand Building When you compare branded apparel to other marketing channels, the return on investment is remarkable. A single billboard might cost hundreds or thousands of dollars per month. A quality branded shirt costs $15-30 and can be worn dozens of times over years. Let’s do some quick math. A $20 branded t-shirt worn twice a week for a year provides roughly 100 wearings. If each wearing exposes your brand to just 20 people, that’s 2,000 impressions for $20—or one penny per impression. Few marketing tactics can compete with that efficiency. Working with a trusted custom apparel provider also gives you flexibility to start small and scale up. You don’t need to order hundreds of items upfront. Begin with a few key pieces for yourself and core team members, then expand as budget allows. Getting Started: What Types of Apparel to Consider Not all branded apparel serves the same purpose, so think strategically about what makes sense for your business. T-shirts are the most versatile and affordable option. They work for casual environments, outdoor events, team-building activities, and everyday wear. Screen printing makes them cost-effective for larger quantities, while DTF & DTG transfers work well if you’re starting with smaller batches. Polo shirts offer a step up in formality. They’re perfect for client-facing roles, trade shows, or businesses where you want to look professional but not overly formal. Adding your logo through custom embroidery gives polo shirts a premium, durable finish that elevates your brand image. Hoodies and jackets provide year-round utility in most climates. They’re excellent for outdoor work, cooler weather, or as premium employee gifts. The larger surface area also allows for more prominent branding. Hats are affordable, practical, and highly visible. They’re particularly effective for businesses in construction, landscaping, or any outdoor industry where sun protection matters. Choosing the Right Design for Your Brand Your branded apparel design should align with your overall brand identity. If your logo and brand colors are already established, use them consistently across all apparel. Keep designs relatively simple for maximum versatility. A clean logo on the chest or left chest area works for almost any situation. You can add additional elements like taglines or website URLs, but simpler designs tend to be more wearable. Consider where and how the apparel will be worn. Casual businesses can embrace fun, creative designs with multiple colors. More conservative industries might stick with subtle logo placement and classic styling. Color selection matters too. Choose shirt colors that complement your logo and represent your brand well. If your logo is dark, lighter colored shirts often provide the best contrast. Deciding on Quantities and Budget For very small teams (1-5 people), start with 2-3 pieces per person. This gives everyone options and ensures people aren’t wearing the same shirt constantly. Medium-sized teams (6-20 people) can benefit from ordering in larger quantities to get better per-piece pricing. Consider 24-50 pieces initially, which
Corporate Swag Ideas That Employees Will Actually Wear
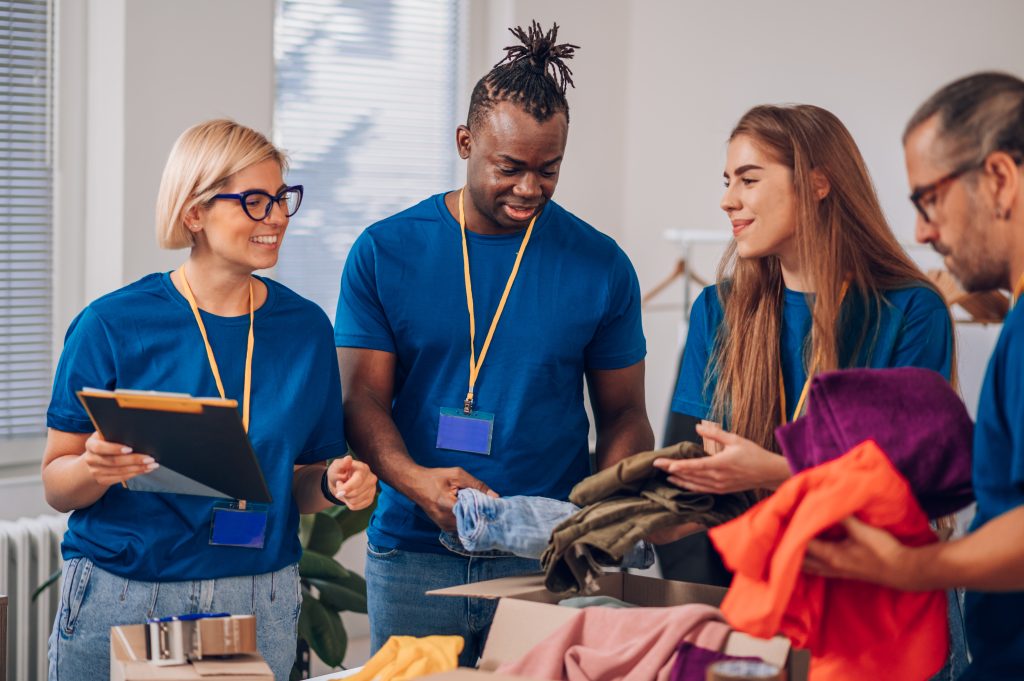
Let’s be honest—most corporate swag ends up in the back of a closet or the bottom of a drawer. That scratchy polo shirt with the oversized logo? Never worn. The cheap pen that stops working after three uses? Tossed in the trash. The generic tote bag? Maybe used once. But it doesn’t have to be this way. When done right, corporate swag can boost morale, strengthen company culture, and turn your employees into enthusiastic brand ambassadors. The key is choosing items people genuinely want to use and wear. Let’s explore corporate swag ideas that your employees will actually appreciate and incorporate into their daily lives. Why Quality Matters More Than Quantity The biggest mistake companies make with corporate swag is prioritizing quantity over quality. Ordering 500 cheap items might seem like a better value than 100 premium ones, but those cheap items often go unused and reflect poorly on your brand. Employees can immediately tell the difference between a $5 shirt and a $25 shirt. Quality fabric feels better, fits better, and lasts longer. When you invest in better materials and construction, people actually want to wear your branded items—not just at required company events, but in their everyday lives. Think about it from your employees’ perspective. Would you rather receive one really nice jacket you’ll wear for years, or five cheap t-shirts that shrink after the first wash? Quality swag shows employees you value them and are willing to invest in their satisfaction. Working with a trusted custom apparel provider ensures you’re getting garments that will hold up to regular wear and washing. Premium items might cost more upfront, but the return on investment—in terms of actual usage and positive brand association—is significantly higher. The Modern Classic: Premium T-Shirts and Polos T-shirts remain a swag staple, but not all t-shirts are created equal. Skip the thin, boxy, basic tees and opt for modern fits in soft, quality fabrics. Tri-blend fabrics offer that worn-in, comfortable feel right out of the package. Heather colors look more sophisticated than solid basics and hide wear better over time. For custom t-shirt printing, consider offering multiple color options rather than forcing everyone into the same shade. Let employees choose between a few coordinating colors that all work with your logo. This small gesture of choice increases the likelihood they’ll actually wear the shirt. Polo shirts elevate the professionalism while remaining comfortable and casual. They’re perfect for client-facing employees or business casual environments. Custom embroidery on polos creates a premium look that lasts longer than printed logos, making them ideal for pieces you want employees to wear repeatedly. Fit matters tremendously. Offer both unisex and fitted options so everyone can find something flattering. Consider extended sizing to ensure all employees feel included and comfortable. Outerwear That Gets Worn Year-Round Quality jackets and hoodies are among the most appreciated swag items because they’re genuinely useful. A well-made jacket becomes a go-to piece that employees reach for constantly—and every time they do, they’re representing your brand. Lightweight fleece jackets work for three seasons and are appropriate for both casual and business settings. They’re perfect for air-conditioned offices, cool mornings, or layering. Soft-shell jackets offer weather resistance for employees who work outdoors or commute in variable weather. Premium hoodies have become workplace-acceptable in many industries and are incredibly popular. Choose quality materials—heavyweight fleece with reinforced stitching—and modern fits. Vintage-washed or enzyme-washed options give that lived-in softness that makes hoodies irresistible. For maximum impact, consider offering outerwear as anniversary gifts or performance rewards rather than giving them to everyone at once. This makes them feel more special and creates something employees look forward to earning. Corporate & team apparel that includes quality outerwear demonstrates a real investment in employee comfort and satisfaction. Beyond Basics: Functional Items People Use Daily The best corporate swag solves real problems or fills genuine needs. Think about what your employees actually use in their daily routines. Water bottles and insulated tumblers are incredibly popular, especially quality stainless steel options that keep drinks cold or hot for hours. Everyone needs to stay hydrated, and a good water bottle gets used daily at work, the gym, or on the go. Employees appreciate practical promo products that serve a real purpose. Backpacks and laptop bags appeal to employees who commute or travel for work. A quality bag with thoughtful features—padded laptop compartments, water bottle pockets, USB charging ports—becomes an essential daily item. Choose subtle logo placement for items employees will use outside of work contexts. Tech accessories like wireless chargers, phone grips, or cable organizers fit seamlessly into modern work life. These items get used constantly and stay visible on desks or in hands throughout the day. Performance athletic wear has broad appeal. Moisture-wicking shirts, athletic shorts, or gym bags encourage healthy lifestyles while extending your brand into employees’ personal time. Many people prefer wearing company athletic gear to the gym over their regular workout clothes. Seasonal and Occasion-Specific Swag Timing your swag to specific seasons or occasions increases relevance and usage. Nobody wants a heavy jacket in July, but they’ll love it in October. Summer items like tank tops, performance tees, or beach towels get used during vacation season and outdoor activities. Branded sunglasses or hats provide sun protection while looking cool at summer events. Winter warmers like beanies, scarves, or touchscreen gloves become daily essentials in colder months. These items get worn repeatedly during their season, providing consistent brand visibility. Holiday gifts show appreciation at year-end. Consider premium items like cozy blankets, nice drinkware, or quality apparel as thank-you gifts that employees can enjoy at home with family. Making Design Choices That Employees Appreciate Even the highest quality item won’t get worn if the design is unappealing. Modern employees want swag that looks good, not just functional billboards for your company. Keep logos appropriately sized. Huge logos screaming across the chest are a major turnoff. Subtle left-chest placement or small sleeve prints feel more like premium branded merchandise than corporate uniforms. Think about how
Planning a Festival or Event? Here’s Your Custom Merch Timeline

You’re planning a festival, concert, charity run, conference, or community event. The venue is booked, performers are lined up, and tickets are selling. But have you thought about custom merchandise? Whether you’re selling t-shirts as a revenue stream or giving away branded items to attendees, proper planning makes all the difference between seamless execution and last-minute scrambling. Custom merchandise takes time to design, produce, and deliver. Rush orders cost more and limit your options. The good news? With the right timeline, you can avoid stress, maximize quality, and ensure your merch arrives exactly when you need it. Let’s walk through the ideal timeline for planning custom merchandise for your event. 3-4 Months Before Your Event: Concept and Design Phase Start planning your merchandise as soon as your event dates are confirmed. This might seem early, but it gives you time to make thoughtful decisions rather than rushed compromises. Begin by defining your merchandise goals. Are you selling items to generate revenue? Giving them away to create buzz and brand recognition? Rewarding VIP ticket holders or volunteers? Your objectives shape everything from design to quantities to budget. Consider your audience demographics. A music festival targeting young adults calls for different merchandise than a corporate conference or family fun run. Think about what your attendees would actually want to wear or use beyond the event itself. This is the time to brainstorm design concepts. If you have an event logo or theme, incorporate it into your merchandise design. Keep it simple and memorable—designs that work well on custom t-shirt printing tend to be bold, clear, and not overly complicated. Work with your design team to create mockups. Explore different color combinations, placement options, and garment styles. Get feedback from stakeholders and test designs with a sample of your target audience if possible. Finalize your artwork during this phase. Ensure all files are print-ready with proper resolution and color specifications. If you’re unsure about technical requirements, consult with your printing provider early—they can review files and suggest improvements before production begins. 2-3 Months Before: Finalizing Details and Placing Orders With your designs approved, it’s time to make concrete decisions about what you’re ordering. Choose your garment styles carefully. Screen printing works excellently for bulk event merchandise because the per-unit cost decreases with larger quantities, making it ideal for festivals and events where you need hundreds or thousands of items. T-shirts are the most popular event merchandise for good reason—they’re affordable, universally wearable, and offer great visibility. Consider offering multiple colors to appeal to different preferences and create variety in the crowd. Tank tops work well for summer outdoor events, while long sleeves or hoodies suit cooler weather or evening concerts. Don’t limit yourself to apparel. Promo products like hats, water bottles, tote bags, or koozies can supplement your merchandise offerings and appeal to people who might not want a shirt. These items often have longer useful lives, keeping your event brand visible long after it ends. Determine your quantities based on expected attendance, demographic makeup, and whether items are free or for sale. For giveaway items, order slightly more than your confirmed attendance to account for volunteers, staff, and last-minute registrants. For merchandise sales, historical data from similar events provides the best guidance, but without that, ordering 15-25% of your expected attendance in various sizes is a reasonable starting point. Get detailed quotes from printing companies. Compare pricing, but also consider turnaround times, quality standards, and their experience with event merchandise. A trusted custom apparel provider who specializes in event work understands the unique pressures and deadlines involved. Place your order at least 8-10 weeks before your event. This timeline allows for standard production without rush fees and provides a buffer for any issues that might arise. Communicate your firm event date clearly so your printer can prioritize your timeline. 6-8 Weeks Before: Production and Quality Control Once your order is placed, production begins. Most custom apparel printing projects take 2-4 weeks for production, depending on order size and complexity. Larger orders naturally require more time. Stay in communication with your printer during this phase. Request updates on production progress and ask about any issues that arise. Good vendors will proactively communicate if they encounter problems, but don’t hesitate to check in periodically. If possible, request a sample or proof before full production begins. This allows you to verify colors, sizing, and print quality. Catching issues at this stage prevents costly mistakes on your entire order. Some printing companies include samples in their process, while others charge a small fee—either way, it’s worth the investment for large event orders. For events using custom embroidery on items like hats or polo shirts for staff, allow extra production time. Embroidery typically takes longer than printing, especially for detailed designs or large quantities. Consider ordering a small batch of merchandise earlier than the rest if you want to use items for pre-event marketing. Teaser photos of your event merchandise on social media can build excitement and even enable pre-sales. Working with a provider who offers DTF & DTG transfers gives you flexibility for smaller promotional batches while still using screen printing for your bulk order. 4-6 Weeks Before: Delivery and Inventory Management Plan for your merchandise to arrive 3-4 weeks before your event. This cushion protects you from shipping delays, quality issues that require reprints, or last-minute quantity adjustments. Inspect everything immediately upon delivery. Check print quality, verify colors match your expectations, and ensure sizes are distributed as ordered. Try on samples to confirm sizing runs true. If you discover problems, you have time to work with your printer on solutions. Organize your inventory systematically. Sort by size, style, and color. Create a clear inventory sheet tracking what you have. This organization prevents chaos when you’re setting up merchandise booths or distribution tables at the event. If you’re pre-selling merchandise, begin fulfilling those orders. Early sales generate revenue before the event and build excitement among attendees who’ll arrive wearing your gear. For very large events,
How Much Does Custom Embroidery Cost in 2026?
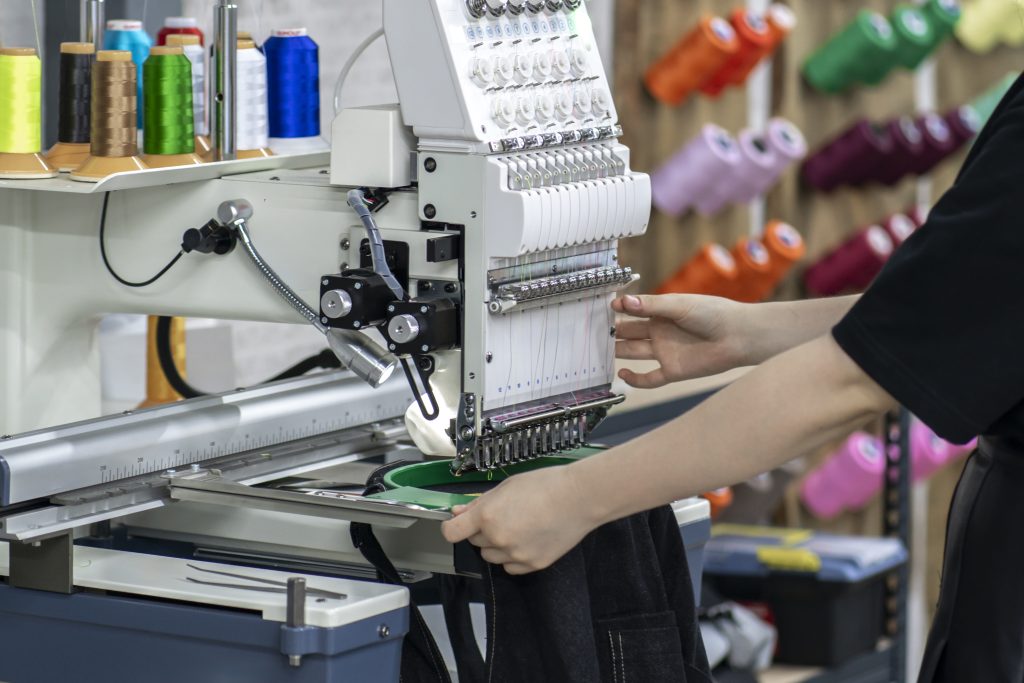
Custom embroidery adds a premium, professional touch to apparel that printing simply can’t match. The raised, textured look of embroidered logos conveys quality and durability, making it the go-to choice for corporate wear, team uniforms, and branded merchandise meant to last. But one question always comes up: how much does it actually cost? The answer isn’t straightforward because embroidery pricing depends on several factors. Understanding what influences the cost helps you budget accurately and make smart decisions about when embroidery makes sense for your project. Let’s break down the pricing structure and what you can expect to pay in 2026. The Basic Pricing Structure Unlike custom t-shirt printing where you might pay a flat rate per shirt, embroidery pricing typically includes two components: a one-time digitizing fee and a per-piece embroidery cost based on stitch count. Digitizing is the process of converting your logo or design into a format embroidery machines can read. This file tells the machine exactly where to place each stitch, what colors to use, and in what order. It’s similar to creating screens for screen printing, but instead of physical screens, you’re creating a digital file. Digitizing fees typically range from $15 to $75 depending on design complexity. A simple text-based logo with clean lines might cost $15-25 to digitize, while an intricate design with fine details, multiple colors, or special effects could run $50-75. The good news? You only pay this fee once. The same digitized file can be used for all future orders. The per-piece embroidery cost is based on stitch count—literally how many stitches are required to complete your design. More stitches mean more time and thread, which increases cost. Most embroiderers charge per 1,000 stitches, with rates typically ranging from $0.50 to $2.00 per thousand stitches. What Affects Stitch Count and Cost Several design factors influence how many stitches your logo requires, directly impacting the final cost. Size is the most obvious factor. A small left-chest logo (around 3-4 inches wide) might contain 4,000-7,000 stitches, while a large back design (10-12 inches) could require 15,000-25,000 stitches or more. Design complexity matters tremendously. Simple designs with solid fills and minimal detail require fewer stitches than intricate designs with fine lines, small text, or detailed imagery. A basic text logo will cost significantly less than a complex crest with multiple elements. The number of colors affects production time and thread changes, though modern multi-head machines handle color changes efficiently. However, each additional color adds slight complexity and may increase the per-piece cost by $0.25-1.00 depending on the embroiderer. Thread type can also impact pricing. Standard polyester thread is included in base pricing, but specialty threads like metallic, glow-in-the-dark, or variegated threads may add $1-3 per piece due to their higher cost and sometimes more delicate handling requirements. Typical Price Ranges for Common Items To give you concrete examples, here’s what you might expect to pay for custom embroidery on common items in 2026, including both digitizing (one-time) and per-piece embroidery costs. For polo shirts with a small left-chest logo (approximately 4 inches wide, 6,000 stitches), expect to pay $8-15 per shirt for embroidery, plus a $20-35 digitizing fee for your first order. The shirt itself typically costs $15-25, bringing your total to $23-40 per embroidered polo. Baseball caps with front or side embroidery (up to 10,000 stitches) usually cost $8-12 per hat for embroidery, plus $25-40 for digitizing. The cap costs $5-15, making your total $13-27 per embroidered hat. Jackets with larger back designs (12,000-20,000 stitches) might cost $15-30 per jacket for embroidery, plus $40-60 for digitizing. Jacket costs vary widely from $30-100+, so total prices range considerably based on garment selection. For corporate & team apparel like button-down shirts with multiple logo placements—left chest and perhaps sleeves or back—expect to pay separately for each placement. Each location requires its own stitch count calculation, though you might get small discounts for multiple placements on the same order. Quantity and Its Impact on Pricing Like most custom apparel services, ordering in larger quantities reduces your per-piece cost. The digitizing fee gets spread across more items, lowering the effective cost per piece significantly. For example, if digitizing costs $30 and you order 10 items, that’s $3 per piece for digitizing. Order 50 items and it drops to $0.60 per piece. Order 100 and it’s just $0.30 per piece. This makes embroidery much more cost-effective at higher quantities. Many embroiderers offer tiered pricing where the per-stitch cost decreases at certain quantity thresholds—perhaps at 24, 50, 100, and 250+ pieces. These price breaks can save 10-30% on larger orders compared to small batches. Minimum order quantities vary by provider. Some accept single-item orders (often with higher per-piece pricing), while others require minimums of 12-24 pieces. Working with a trusted custom apparel provider who understands your needs helps you find the right balance between quantity and budget. When Embroidery Costs More Than Printing Embroidery is almost always more expensive per piece than printing methods like screen printing or DTF & DTG transfers. A logo that costs $8 to embroider might only cost $2-4 to screen print at similar quantities. However, embroidery offers value that justifies the premium. The dimensional, textured look is more sophisticated and professional than printing. Embroidery is significantly more durable—it won’t crack, peel, or fade like some prints can. For items that will be washed frequently or worn in demanding conditions, embroidery’s longevity makes it cost-effective long-term. Embroidery also elevates perceived value. The same polo shirt feels more premium with embroidery than printing. This matters for corporate apparel, client gifts, or retail merchandise where quality perception impacts brand image. Consider the garment type too. Embroidery works beautifully on textured fabrics, fleece, and materials where printing might not adhere well. For items like beanies, backpacks, or certain performance fabrics, embroidery may be your best or only option. Additional Costs to Consider Beyond basic embroidery, several optional elements can affect your total cost. 3D puff embroidery, which creates raised, dimensional text or designs, adds $1-3 per piece
What’s the Difference Between DTF and DTG Printing?

When you’re exploring options for custom apparel, you’ll likely encounter two popular digital printing methods: DTF (Direct-to-Film) and DTG (Direct-to-Garment). Both technologies have revolutionized the custom printing industry, but they work differently and excel in different situations. Understanding the differences between these methods helps you choose the right approach for your project, ensuring the best quality and value for your investment. Let’s break down what sets DTF and DTG apart and when each method makes the most sense. How DTG Printing Works Direct-to-Garment printing works exactly like its name suggests—ink is sprayed directly onto the fabric using specialized inkjet technology. Think of it as a sophisticated printer designed specifically for textiles instead of paper. The process starts with pre-treating the garment, especially if it’s a dark-colored fabric. This pre-treatment creates a base layer that helps the ink adhere properly and appear vibrant. The shirt is then placed on a platen, and the DTG printer applies water-based ink directly to the fabric fibers. Finally, the garment goes through a heat press to cure the ink and ensure durability. DTG printing excels at reproducing complex, detailed designs with unlimited colors. Photographs, intricate artwork, and designs with gradients or subtle color variations look stunning with this method. Because the ink absorbs into the fabric fibers, the print feels soft and lightweight—you barely notice it’s there. This technology works best on 100% cotton or high cotton-content fabrics. The natural fibers absorb the water-based inks beautifully. However, DTG printing can be challenging on polyester or other synthetic materials, which is an important consideration when choosing your garment. How DTF Printing Works Direct-to-Film is a newer technology that takes a different approach. Instead of printing directly on the garment, the design is first printed onto a special film using specialized inks. Adhesive powder is applied to the wet ink, then the film is heat-cured. Finally, the design is transferred from the film to the garment using a heat press. This extra step—printing to film first—gives DTF significant advantages in versatility. The transfers can be applied to almost any fabric type: cotton, polyester, blends, nylon, and even some synthetic materials that don’t work well with DTG. This flexibility makes DTF transfers incredibly popular for diverse product lines. DTF prints have a slightly different feel compared to DTG. There’s a very thin layer on top of the fabric rather than ink absorbed into it, though modern DTF produces much softer prints than older transfer methods like vinyl. The finish is smooth and durable, with excellent color vibrancy on both light and dark garments. One unique advantage of DTF is that transfers can be printed and stored, then applied to garments as needed. This enables on-demand production and quick turnaround times for smaller orders or custom individual pieces. Print Quality and Detail Comparison Both methods produce high-quality results, but they have different strengths. DTG generally offers slightly better detail reproduction for extremely intricate designs with fine lines or subtle gradients. The direct application allows for precise dot placement, similar to printing a high-resolution photo on paper. DTF has caught up significantly in recent years, though. Modern DTF technology produces remarkably detailed prints with vibrant colors and sharp edges. For most designs, the quality difference is negligible to the average observer. Color vibrancy is excellent with both methods. DTG colors can appear slightly more muted on dark garments because they’re absorbed into the fabric, even with white underbase. DTF often produces more vibrant, saturated colors on dark fabrics because the transfer sits on top of the material. Both methods handle full-color designs easily, making them superior to traditional screen printing for complex artwork. There are no additional charges for adding more colors, unlike screen printing where each color requires a separate screen. Fabric and Garment Compatibility This is where DTF and DTG diverge significantly. DTG works beautifully on natural fibers, particularly 100% cotton. Cotton-poly blends work okay if they’re at least 60% cotton, but print quality and durability decrease as polyester content increases. Pure polyester is generally not suitable for DTG printing. DTF works on virtually everything. Cotton, polyester, tri-blends, nylon, spandex blends, even some leather and specialty materials accept DTF transfers. If you’re creating corporate & team apparel that includes various garment types—cotton t-shirts, polyester performance wear, and nylon jackets—DTF provides the consistency to use the same printing method across all items. Garment color matters more for DTG than DTF. DTG on dark garments requires white underbase pre-treatment, which adds steps, cost, and can affect the softness of the final print. DTF handles light and dark garments with equal ease, requiring no special preparation for dark colors. Durability and Wash Performance Both methods produce durable prints when done correctly, but their longevity characteristics differ slightly. DTG prints, being absorbed into the fabric, can last for years with proper care. The main enemy is aggressive washing—hot water and harsh detergents can gradually fade DTG prints. Washing inside-out in cold water and avoiding high-heat drying extends their life significantly. DTF prints are extremely durable and resistant to cracking or peeling. Because the transfer is bonded to the fabric surface rather than absorbed into it, DTF often outlasts DTG in heavy-wash situations. The adhesive technology has advanced tremendously, creating bonds that withstand repeated commercial washing. For items that will be washed frequently, like work uniforms or athletic wear, DTF typically provides better longevity. For retail merchandise or casual wear that’s washed less aggressively, both methods perform excellently. Cost Considerations Pricing varies based on design size, garment type, and order quantity, but some general patterns exist. For very small quantities (1-10 pieces), DTF is often more cost-effective because transfers can be produced and applied quickly without extensive setup. DTG also works for small batches but requires individual garment pre-treatment for dark colors. For medium quantities (25-100 pieces), pricing is often comparable between the two methods. Your specific design and garment choice may tip the balance one way or another. For very large quantities (200+ pieces), traditional screen printing usually becomes the most