
How to Prepare Your Artwork for Custom Embroidery: A Step-by-Step Guide
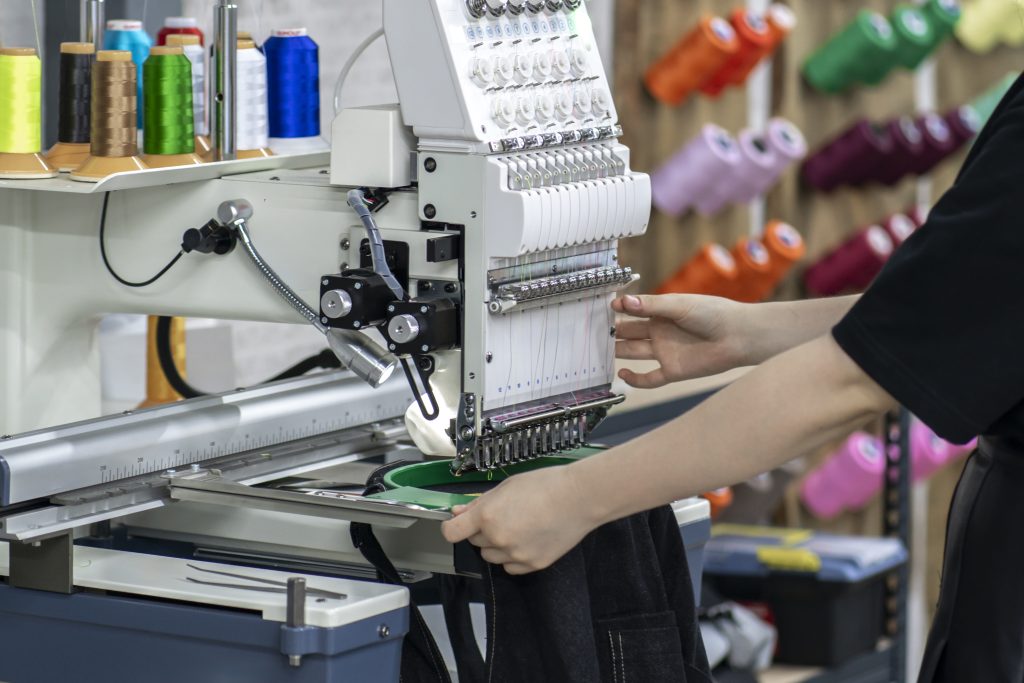
Custom embroidery adds a premium, professional touch to apparel that elevates your brand. But the quality of your final embroidered product depends heavily on how well you prepare your artwork. Unlike printing methods where almost any digital file can work, embroidery has specific requirements that directly impact the final result. Poor artwork preparation leads to costly revisions, delays, and embroidered designs that don’t match your vision. The good news? With proper preparation, you can ensure your embroidered apparel looks crisp, professional, and exactly how you imagined. Let’s walk through the step-by-step process of preparing artwork for custom embroidery. Understanding How Embroidery Works Before diving into artwork preparation, it helps to understand what happens during the embroidery process. Unlike screen printing where ink is applied to fabric, embroidery uses needles and thread to stitch your design directly into the garment. Your digital artwork must be converted into a digitized embroidery file—essentially a set of instructions telling the machine where to place each stitch, what color thread to use, and in what order. This digitizing process is critical and requires expertise to translate your design into thread effectively. The embroidery machine follows these instructions, stitching your design one color at a time. Thread has physical limitations that digital designs don’t—it can’t reproduce extremely fine details, gradients, or photographic images the way DTF & DTG transfers can. Understanding these limitations from the start helps you create artwork that embroideries beautifully. Step 1: Start With Vector Files When Possible The best artwork for embroidery starts as a vector file. Vector graphics (AI, EPS, or PDF formats created in programs like Adobe Illustrator) use mathematical paths rather than pixels, giving clean, scalable lines that digitizers can easily work with. Vector files make the digitizing process faster and more accurate, which often translates to lower digitizing fees and better final results. The clean edges and solid shapes in vector artwork translate perfectly into the clean stitch lines embroidery produces. If your logo or design was professionally created, contact your designer for the original vector files. These are the gold standard for embroidery preparation and will give you the best possible results. If you only have raster files (JPG, PNG), high-resolution versions at least 300 DPI can work, but the digitizer will need to spend extra time interpreting the design. This can increase costs and introduce slight variations from your original artwork. Step 2: Simplify Your Design Embroidery favors simplicity. The most successful embroidered designs have clean lines, solid fills, and minimal fine detail. Think of iconic brand logos like Nike, Adidas, or Ralph Lauren—simple, bold, and instantly recognizable when embroidered. Review your design and remove unnecessary complexity. Thin lines that look great on screen often become thick, blurred stitches in embroidery. Text smaller than about 0.25 inches tall (roughly 18-point font) becomes illegible when stitched. Intricate details, tiny decorative elements, or complex patterns usually don’t translate well. If your logo has gradient shading or photographic elements, these need to be simplified for embroidery. Gradients don’t exist in thread—you have solid colors only. Work with a professional to adapt complex designs into embroidery-friendly versions while maintaining brand recognition. Consider creating a simplified embroidery version of your logo separate from your full-detail print version. Many successful brands maintain multiple logo variations optimized for different applications. Step 3: Choose Appropriate Colors Thread comes in specific colors, typically matched to the Pantone color system. While there are thousands of thread colors available, they’re still discrete options—not the millions of colors possible in digital design. Review your design’s color palette and identify the exact colors you want. If brand color accuracy is critical, specify Pantone colors so your embroiderer can match thread as closely as possible. Most custom embroidery providers have extensive thread color charts you can reference. Limit the number of colors when possible. While modern embroidery machines handle multiple colors easily, each additional color adds production time and cost. Designs with 1-4 colors are ideal. If your design has more, evaluate whether all colors are essential or if some can be combined without losing impact. Avoid colors that are too similar to each other or to the garment color. Light yellow on white fabric will barely show. Navy and black next to each other may look identical when stitched. Ensure sufficient contrast between colors and between your design and the garment. Step 4: Optimize Text Elements Text presents unique challenges in embroidery. Not all fonts translate well to stitches, and size limitations are stricter than with printing. Minimum text height should be 0.25 inches (about 18-point font), with 0.375 inches (24-point) being safer for readability. Anything smaller becomes a blob of stitches rather than legible letters. For corporate & team apparel where text is essential, size appropriately or consider using vinyl transfers for small text elements. Choose bold, simple fonts without thin serifs or decorative flourishes. Sans-serif fonts like Arial, Helvetica, or similar work beautifully. Script fonts can work if they’re relatively bold and simple, but delicate calligraphy-style scripts rarely embroider well. Avoid outlining text unless it’s quite large (1 inch or taller). Outlined text requires the machine to stitch the outline, then the fill, doubling production time and creating potential registration issues if the layers don’t align perfectly. Ensure adequate spacing between letters and words. Embroidery thread has physical thickness, so letters that touch or overlap in your digital file will blend together when stitched. Step 5: Consider Size and Placement Your design size dramatically affects how well it embroideries. The same design might work beautifully at 4 inches wide but become a mess at 2 inches due to detail compression. Standard left-chest logo placement typically ranges from 3.5 to 4.5 inches wide. This size allows sufficient detail while looking proportional on most garments. Larger designs (6-12 inches) work for jacket backs or full-chest placements but require simpler artwork since any flaws become more visible. Think about where the design will be placed and how that affects what details are necessary. A design on a hat brim
How Much Does Custom Embroidery Cost in 2026?
Custom embroidery adds a premium, professional touch to apparel that printing simply can’t match. The raised, textured look of embroidered logos conveys quality and durability, making it the go-to choice for corporate wear, team uniforms, and branded merchandise meant to last. But one question always comes up: how much does it actually cost? The answer isn’t straightforward because embroidery pricing depends on several factors. Understanding what influences the cost helps you budget accurately and make smart decisions about when embroidery makes sense for your project. Let’s break down the pricing structure and what you can expect to pay in 2026. The Basic Pricing Structure Unlike custom t-shirt printing where you might pay a flat rate per shirt, embroidery pricing typically includes two components: a one-time digitizing fee and a per-piece embroidery cost based on stitch count. Digitizing is the process of converting your logo or design into a format embroidery machines can read. This file tells the machine exactly where to place each stitch, what colors to use, and in what order. It’s similar to creating screens for screen printing, but instead of physical screens, you’re creating a digital file. Digitizing fees typically range from $15 to $75 depending on design complexity. A simple text-based logo with clean lines might cost $15-25 to digitize, while an intricate design with fine details, multiple colors, or special effects could run $50-75. The good news? You only pay this fee once. The same digitized file can be used for all future orders. The per-piece embroidery cost is based on stitch count—literally how many stitches are required to complete your design. More stitches mean more time and thread, which increases cost. Most embroiderers charge per 1,000 stitches, with rates typically ranging from $0.50 to $2.00 per thousand stitches. What Affects Stitch Count and Cost Several design factors influence how many stitches your logo requires, directly impacting the final cost. Size is the most obvious factor. A small left-chest logo (around 3-4 inches wide) might contain 4,000-7,000 stitches, while a large back design (10-12 inches) could require 15,000-25,000 stitches or more. Design complexity matters tremendously. Simple designs with solid fills and minimal detail require fewer stitches than intricate designs with fine lines, small text, or detailed imagery. A basic text logo will cost significantly less than a complex crest with multiple elements. The number of colors affects production time and thread changes, though modern multi-head machines handle color changes efficiently. However, each additional color adds slight complexity and may increase the per-piece cost by $0.25-1.00 depending on the embroiderer. Thread type can also impact pricing. Standard polyester thread is included in base pricing, but specialty threads like metallic, glow-in-the-dark, or variegated threads may add $1-3 per piece due to their higher cost and sometimes more delicate handling requirements. Typical Price Ranges for Common Items To give you concrete examples, here’s what you might expect to pay for custom embroidery on common items in 2026, including both digitizing (one-time) and per-piece embroidery costs. For polo shirts with a small left-chest logo (approximately 4 inches wide, 6,000 stitches), expect to pay $8-15 per shirt for embroidery, plus a $20-35 digitizing fee for your first order. The shirt itself typically costs $15-25, bringing your total to $23-40 per embroidered polo. Baseball caps with front or side embroidery (up to 10,000 stitches) usually cost $8-12 per hat for embroidery, plus $25-40 for digitizing. The cap costs $5-15, making your total $13-27 per embroidered hat. Jackets with larger back designs (12,000-20,000 stitches) might cost $15-30 per jacket for embroidery, plus $40-60 for digitizing. Jacket costs vary widely from $30-100+, so total prices range considerably based on garment selection. For corporate & team apparel like button-down shirts with multiple logo placements—left chest and perhaps sleeves or back—expect to pay separately for each placement. Each location requires its own stitch count calculation, though you might get small discounts for multiple placements on the same order. Quantity and Its Impact on Pricing Like most custom apparel services, ordering in larger quantities reduces your per-piece cost. The digitizing fee gets spread across more items, lowering the effective cost per piece significantly. For example, if digitizing costs $30 and you order 10 items, that’s $3 per piece for digitizing. Order 50 items and it drops to $0.60 per piece. Order 100 and it’s just $0.30 per piece. This makes embroidery much more cost-effective at higher quantities. Many embroiderers offer tiered pricing where the per-stitch cost decreases at certain quantity thresholds—perhaps at 24, 50, 100, and 250+ pieces. These price breaks can save 10-30% on larger orders compared to small batches. Minimum order quantities vary by provider. Some accept single-item orders (often with higher per-piece pricing), while others require minimums of 12-24 pieces. Working with a trusted custom apparel provider who understands your needs helps you find the right balance between quantity and budget. When Embroidery Costs More Than Printing Embroidery is almost always more expensive per piece than printing methods like screen printing or DTF & DTG transfers. A logo that costs $8 to embroider might only cost $2-4 to screen print at similar quantities. However, embroidery offers value that justifies the premium. The dimensional, textured look is more sophisticated and professional than printing. Embroidery is significantly more durable—it won’t crack, peel, or fade like some prints can. For items that will be washed frequently or worn in demanding conditions, embroidery’s longevity makes it cost-effective long-term. Embroidery also elevates perceived value. The same polo shirt feels more premium with embroidery than printing. This matters for corporate apparel, client gifts, or retail merchandise where quality perception impacts brand image. Consider the garment type too. Embroidery works beautifully on textured fabrics, fleece, and materials where printing might not adhere well. For items like beanies, backpacks, or certain performance fabrics, embroidery may be your best or only option. Additional Costs to Consider Beyond basic embroidery, several optional elements can affect your total cost. 3D puff embroidery, which creates raised, dimensional text or designs, adds $1-3 per piece